
If you want to be a progressive senior Jedi developer, in this article, you will have the chance to see the approach of how Selenium Grid can be used in conjunction with Appium for parallel test execution on multiple physical mobile devices. So, let’s begin.
What is Selenium Grid?
Selenium Grid is a part of the Selenium Suite specialized for running multiple tests across different browsers, operating systems, and machines in parallel.
- Allows us to execute test scripts on different machines at the same time.
- Execution is possible on:
- Different machines with different browsers
- Same browser but with different versions
- It saves a lot of time and effort for execution
- It consists of a Hub and multiple nodes
- Hub works as a central point controlling all the nodes
- Nodes are actual machines on which execution is done
How Selenium Grid Works?
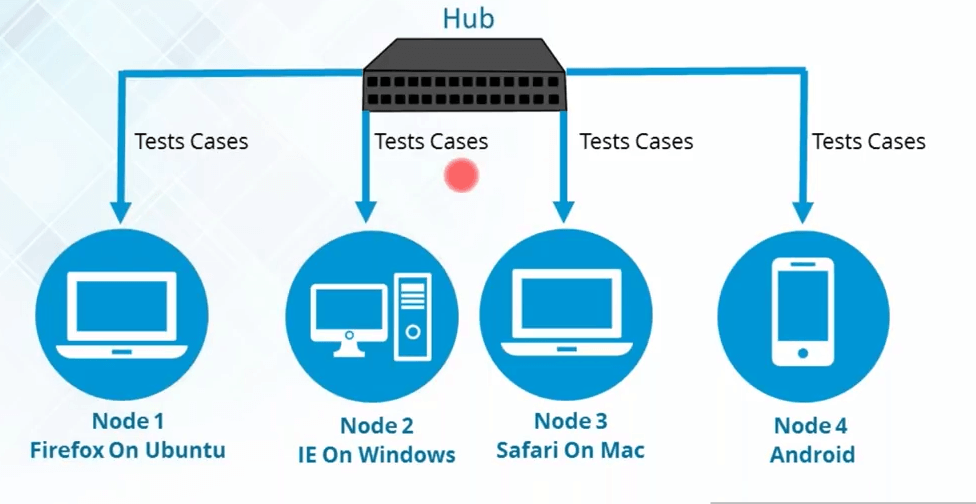
In Selenium Grid, the hub is a computer which is the central point where we can load our tests. Hub also acts as a server because of which it acts as a central point to control the network of Test machines. The Selenium Grid has only one hub and it is the master of the network. When a test with given DesiredCapabilities is given to the Hub, the Hub searches for the node that matches the given configuration. For example, you can say that you want to run the test on Windows 10 and on Chrome browsers with version XXX. Hub will try to find a machine in the Grid that matches the criterion and will run the test on that Machine. If there is no match, then the hub returns an error. There should be only one hub in a Grid.
A node is referred to as a Test Machine which opts to connect with the Hub. This test machine will be used by Hub to run tests on. A Grid network can have multiple nodes. A node is supposed to have different platforms i.e. different operating systems and browsers. The node does not need the same platform for running as that of the hub.
First, you need to create a hub. Then you can connect (or “register”) nodes to that hub. Nodes are where your tests will run, and the hub is responsible for making sure your tests end up on the right one (e.g., the machine with the operating system and browser you specified in your test).
Building a Selenium Grid for Appium Mobile Automated Testing
Mobile Test Automation is increasingly becoming very important. Almost all web applications are responsive these days and it’s very important to test how the application works across devices. The same is true with the native application as well. At the same time, the number of devices and the custom OS versions on devices are also vast. This means that it’s harder for a tester to manually run the tests over multiple devices, even if tests are automated.
Hence there is a need to run the tests in parallel, which provides faster feedback about the quality of the application under test. There are a couple of open-source test automation tools in the market for testing mobile applications. One of the most popular is Appium, a cross-platform automation tool, which can run tests on both Android and iOS devices.
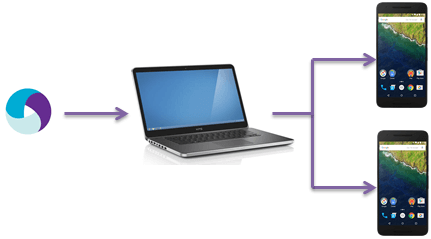
In this article, it will provide guidance on how Appium can be used in conjunction with Selenium Grid for parallel test execution on multiple mobile devices. The configuration that was used was:
- Laptop: Windows 10 with Selenium Grid and Appium Server
- Appium Server: Version 1.7.0
- Mobile Devices: Samsung Galaxy S7-Android 7.0 and Samsung Galaxy S5 mini-Android 6.0.1
- Connection Method: Both mobile devices are connected to the same laptop via USB ports
Configure Hub
- Download Selenium Standalone Server from http://docs.seleniumhq.org/download/ (Actually, Selenium Server is one .jar file)
- Start the command prompt and navigate to the folder in which you placed the Selenium server jar file
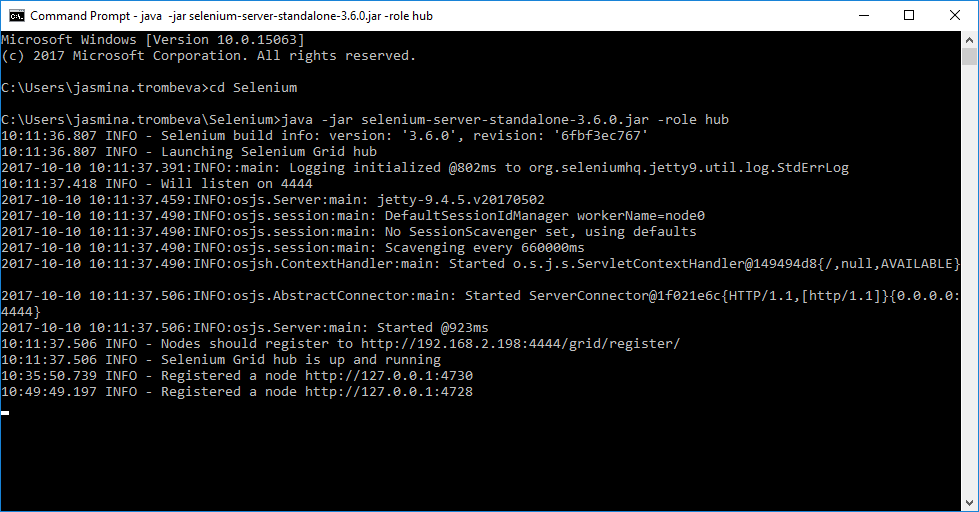
- Execute the following command: java –jar selenium-server-standalone-3.6.0.jar –role hub, where selenium-server-standalone-3.6.0.jar is the name of the downloaded .jar file
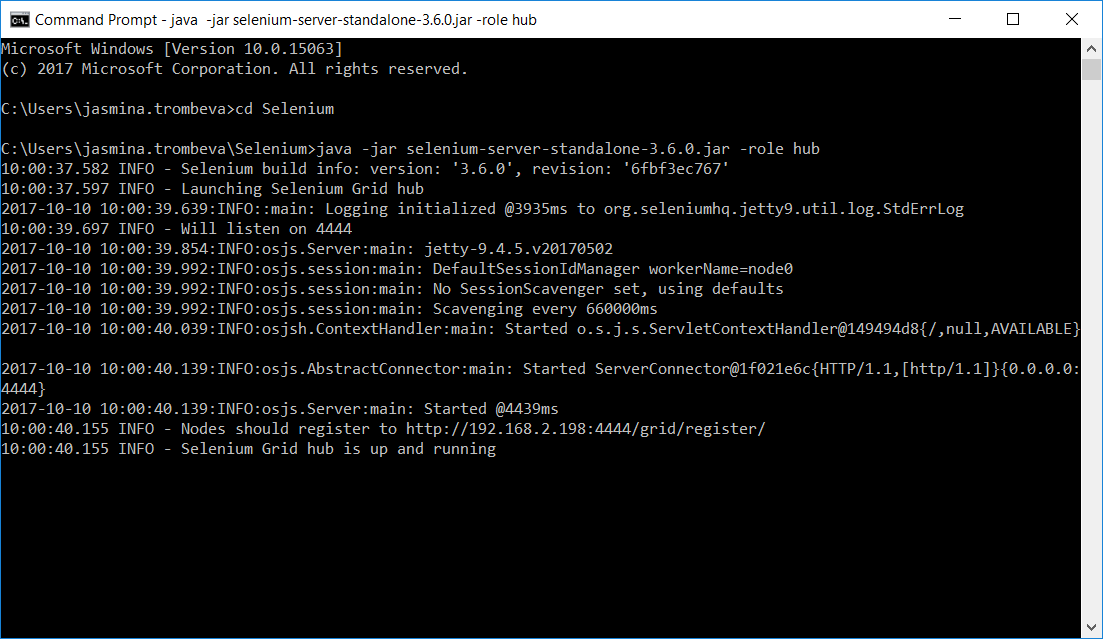
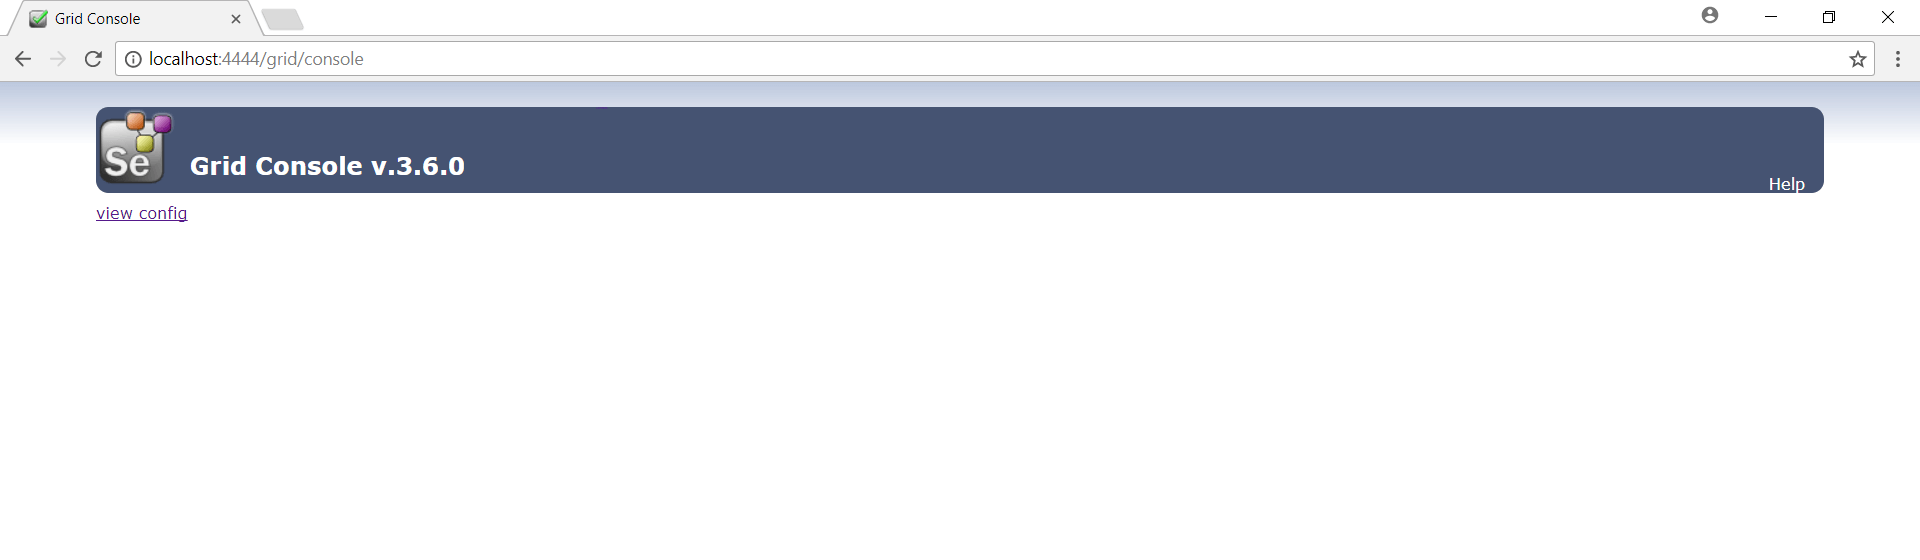
This will start the selenium grid server in your local IP with the default port of 4444. After you see this message Selenium Grid hub is up and running, open your browser and hit the following URL http://<your ip>:4444/grid/console and you should be able to navigate to Grid Console:
Configure Appium nodes
In this example are used two devices: Samsung S7 and Samsung S5 mini, and for each of those devices, separate grid nodes will be configured. In order for grid nodes to be set up, separate .json configuration files need to be created for both devices, which further will be uploaded in Appium server instances.
Node1.json (for Samsung S5)
{
	"capabilities": [{
			"browserName": "Android",
			"version": "6.0.1",
			"maxInstances": 1,
			"platform": "ANDROID"
		}
	],
	"configuration": {
		"cleanUpCycle": 2000,
		"timeout": 30000,
		"proxy": "org.openqa.grid.selenium.proxy.DefaultRemoteProxy",
		"url": "http://127.0.0.1:4730/wd/hub",
		"maxSession": 1,
		"port": "4730",
		"host": "127.0.0.1",
		"register": true,
		"registerCycle": 5000,
		"hubPort": "4444",
		"hubHost": "127.0.0.1"
	}
}
Node2.json (for Samsung S7){
"capabilities":
[{
"browserName": "Android",
"version": "7.0",
"maxInstances": 1,
"platform": "ANDROID"
}
],
"configuration": {
"cleanUpCycle": 2000,
"timeout": 30000,
"proxy": "org.openqa.grid.selenium.proxy.DefaultRemoteProxy",
"url": "http://127.0.0.1:4728/wd/hub",
"maxSession": 1,
"port": "4728",
"host": "127.0.0.1",
"register": true,
"registerCycle": 5000,
"hubPort": "4444",
"hubHost": "127.0.0.1"
}
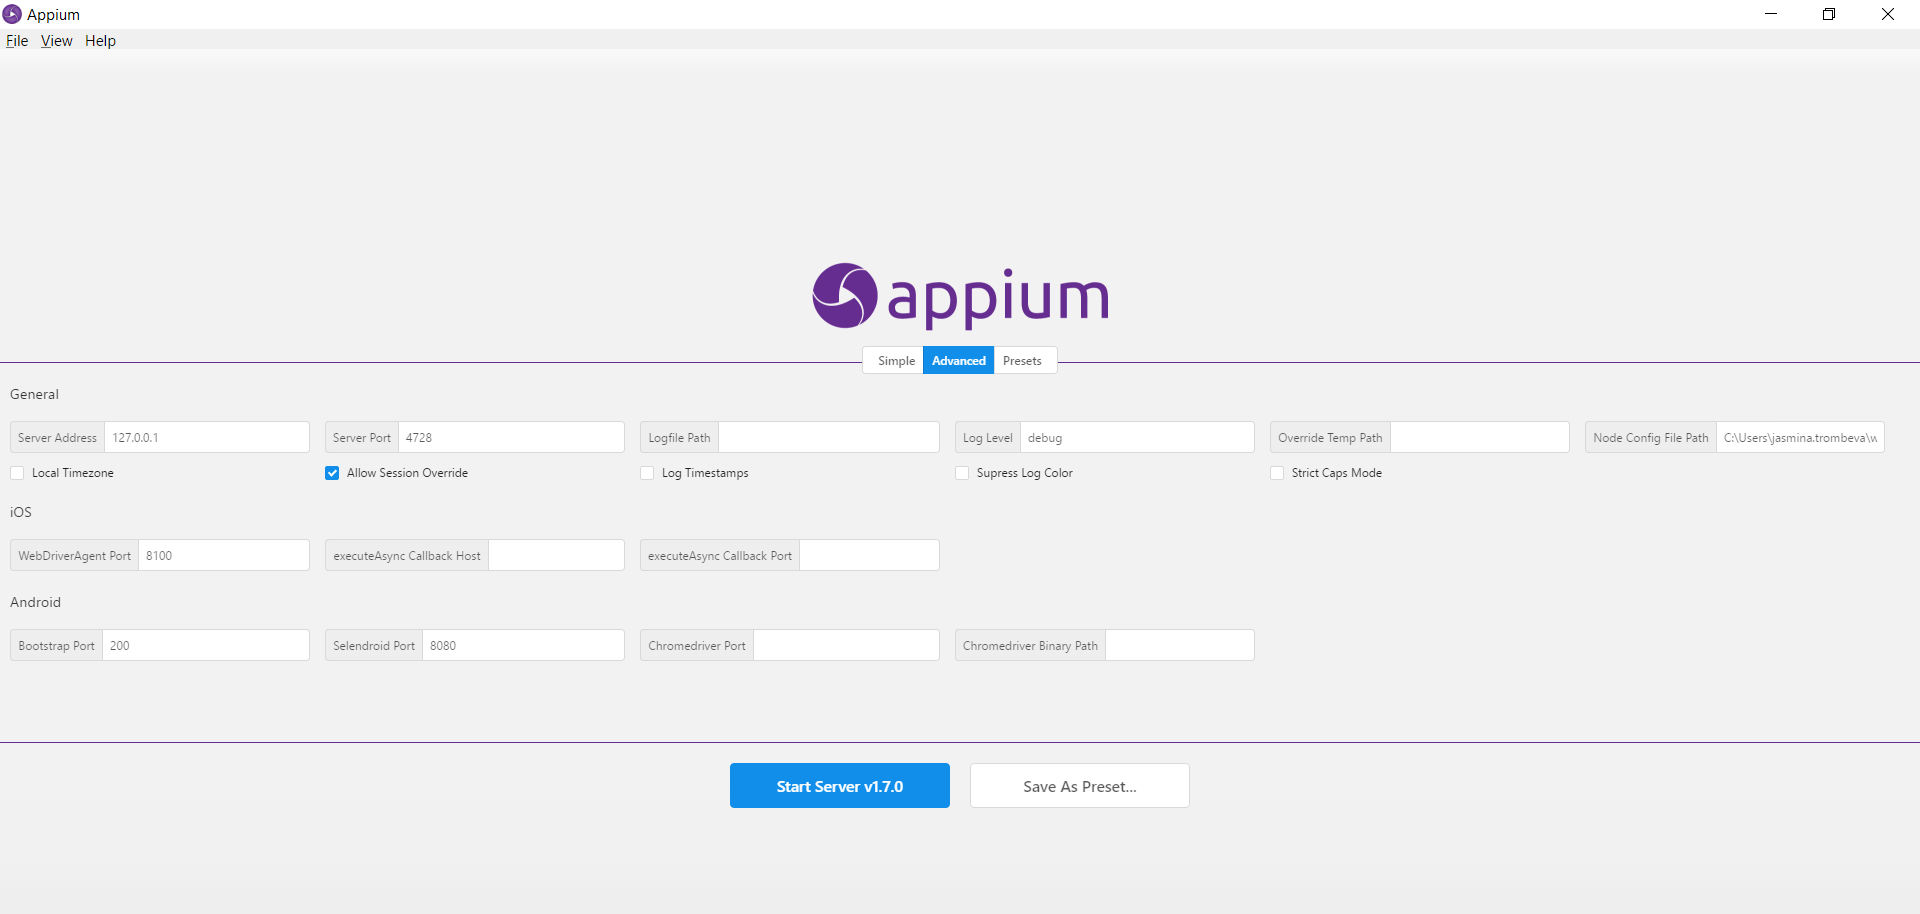
}In order for tests to run on the two devices, two separate instances of Appium Server need to be run with different values for the Server and Bootstrap port.
The configuration for node1 should look like the image below. Please note that the Server Port is set to 4730, the same as in the .json config file, while the path to the .json config file is added under the Node Config File Path.
Similarly, the Server Port for the Appium server connected to Node 2 is set to port 4728, the same as in corresponding .json file.
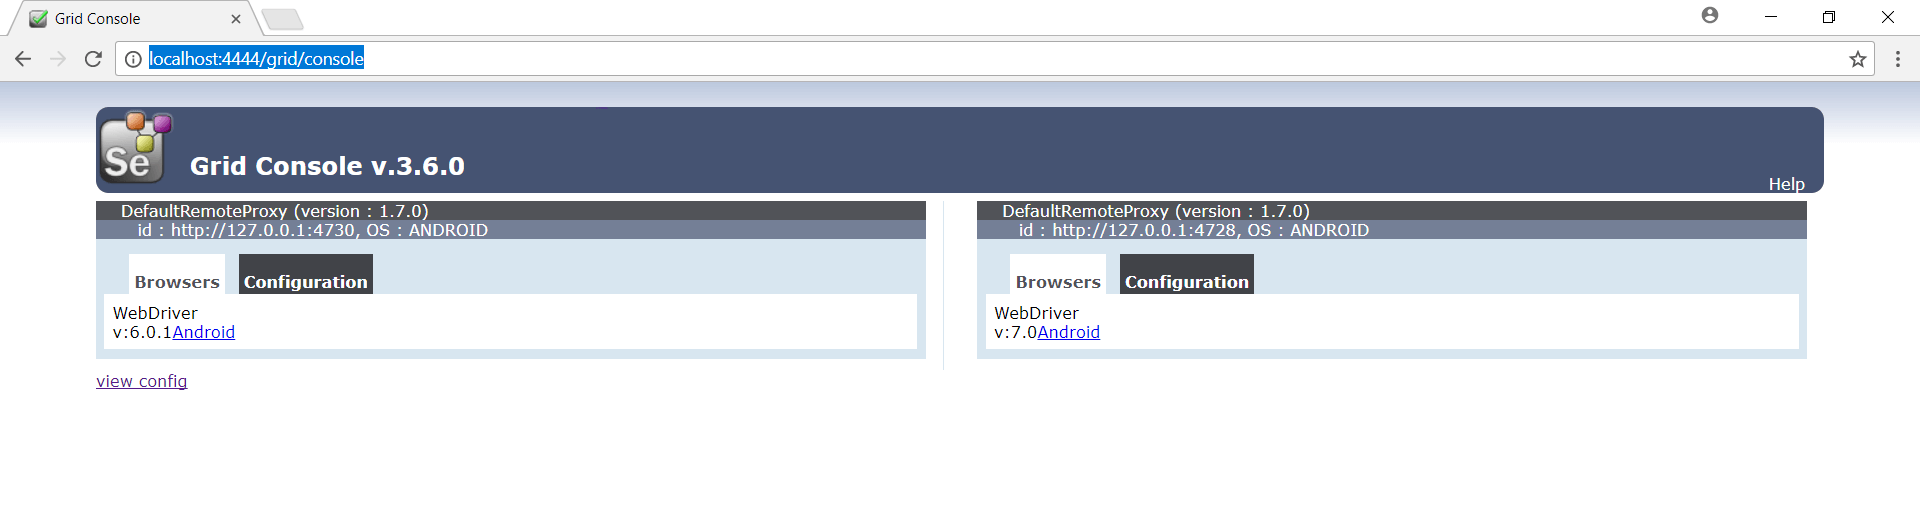
After starting both Appium Servers, in started Hub console, you can notice that each server is registered as a separate node on the corresponding ports 4730 and 4728.
Also, if you navigate to the Grid Console http://localhost:4444/grid/console, you can notice both registered devices as separate nodes
Conclusion
This article described an approach for building a local device farm utilizing Selenium Grid and Appium. In my next Selenium Grid blog tutorial I’ll describe how Jenkins can be connected to the built local device farm for automatic test execution and reporting.